Notice: Undefined index: blog_config in /var/www/clients/client0/web1/web/var/cache/prod/smarty/compile/ZOneTheme/64/69/93/646993cf8763aea1dfa5801f1386ac3e8b58da5b_2.file.single_post.tpl.php on line 24
Notice: Trying to get property 'value' of non-object in /var/www/clients/client0/web1/web/var/cache/prod/smarty/compile/ZOneTheme/64/69/93/646993cf8763aea1dfa5801f1386ac3e8b58da5b_2.file.single_post.tpl.php on line 24
Notice: Trying to access array offset on value of type null in /var/www/clients/client0/web1/web/var/cache/prod/smarty/compile/ZOneTheme/64/69/93/646993cf8763aea1dfa5801f1386ac3e8b58da5b_2.file.single_post.tpl.php on line 24

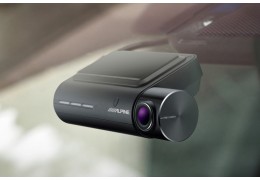
How do I install a Dashcam?
The Dashcam attracts an increasing number of drivers. Moreover, this equipment is advised by insurers and public authorities. Used to film, record and view all the information during a journey, the car camera is particularly useful in the event of a disaster. How to install a Dashcam ? This article guides you on the different stages of setting up this mini camera on your vehicle.
The implementation of a Camera on a car is done in 3 steps:
Fixing the on-board camera
Connecting the device
The setting to optimize the view of the road.
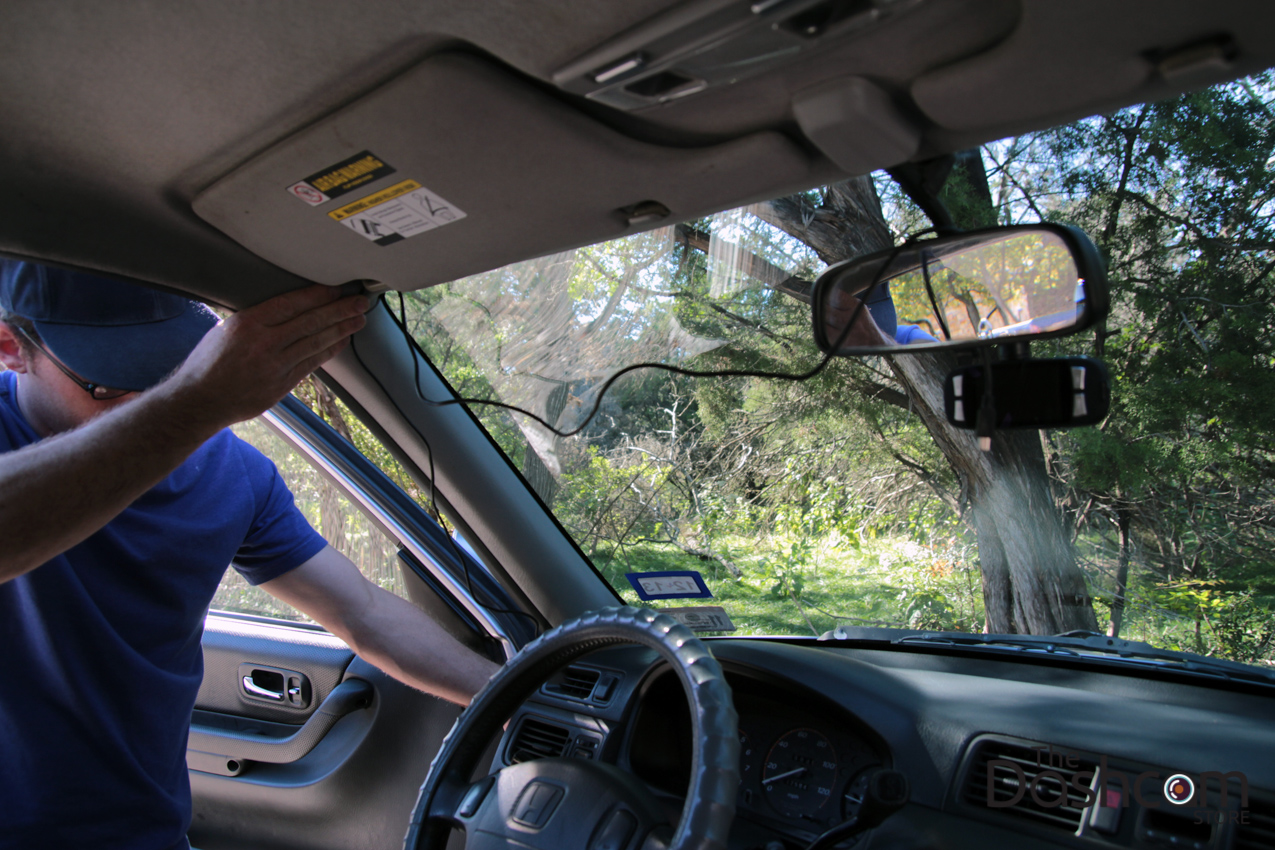
Fixing a Dashcam
The place where the Camera For Car will be installed varies depending on the camera model chosen. There are three different fastening systems:
The attachment to the rear-view mirror: the on-board camera is designed to be attached to the rearview mirror of the vehicle.
Attachment with an adhesive system: the device can be attached to the location chosen by the driver.
The suction cup attachment: The Dashcam can be placed right at the back of the rearview mirror or directly on the windshield.
Connecting a Dashcam
This step is to feed the Camera For Car to put it into service. There are three types of connection:
The classic connection
The Dashcam is plugged directly into the vehicle's cigarette lighter. This simple method is recommended for drivers who have just basic electrical circuit skills. Here's how to do it:
The first step is to connect the power cable to the device.
Pass the cable through the roof pads of the vehicle to reach the passenger side door. It then lodges it in the seal of the door mount to reach under the glove box on which the cable is attached with the help of clamping collars.
Then all that remains is to plug the power into the cigarette lighter. It is possible to opt for another alternative, which is to go around the windshield:
Take the cable and bypass the windshield.
To reach the cigarette lighter, the wire must pass through the dashboard.
So that the cable is not too apparent, it is best to hide it in the mouldings.
The main drawback of this connection method is that it blocks the connection of other devices to the cigarette lighter (e.g. a GPS or mobile phone).
The dashcam connects to the fuse box
This method is recommended for drivers who are not new to the electrical circuit of a vehicle and who are able to apply the instructions given by the Dashcam in the notice.
It is a matter of plugging 3 wires to the fuse box: 2 wires are intended to power the car camera, the third is connected to the mass. The first thread is used to launch the Camera when the vehicle starts, the fuse is only powered when the engine starts. The second, connected to a constantly powered fuse, is used to keep the camera running even if the vehicle's engine stops. It allows you to use the parking mode.
Connection with additional equipment This technique involves using a complementary device that serves as an external battery for the Dashcam. This equipment is connected to the car's fuse box. Thus, even when the vehicle is not running, the Camera For Car continues to function. This is the most aesthetically pleasing and easiest connection mode to achieve.
At some point, the battery of the stopped vehicle no longer sends any charge to the additional equipment during prolonged use of the parking mode. The device's external battery must then use its own resources to feed itself. To prevent it from emptying completely, it can be set up by setting up a timer or setting a threshold for voltage. The power is automatically turned off when the timer time is up or when the voltage becomes below the predefined threshold.
Setting the Dashcam
This final stage of installation consists of setting up the device. It's a matter of checking:
The quality of the video images
The quality of the device's recording
The extent of the angle of view that should be as wide as possible
The brightness
The sound quality
The right height for the camera lens to capture all movements in front of the vehicle.
Notice: Undefined index: blog_config in /var/www/clients/client0/web1/web/var/cache/prod/smarty/compile/ZOneTheme/64/69/93/646993cf8763aea1dfa5801f1386ac3e8b58da5b_2.file.single_post.tpl.php on line 314
Notice: Trying to get property 'value' of non-object in /var/www/clients/client0/web1/web/var/cache/prod/smarty/compile/ZOneTheme/64/69/93/646993cf8763aea1dfa5801f1386ac3e8b58da5b_2.file.single_post.tpl.php on line 314
Notice: Trying to access array offset on value of type null in /var/www/clients/client0/web1/web/var/cache/prod/smarty/compile/ZOneTheme/64/69/93/646993cf8763aea1dfa5801f1386ac3e8b58da5b_2.file.single_post.tpl.php on line 314
Related posts
Notice: Undefined index: blog_config in /var/www/clients/client0/web1/web/var/cache/prod/smarty/compile/ZOneTheme/64/69/93/646993cf8763aea1dfa5801f1386ac3e8b58da5b_2.file.single_post.tpl.php on line 984
Notice: Trying to get property 'value' of non-object in /var/www/clients/client0/web1/web/var/cache/prod/smarty/compile/ZOneTheme/64/69/93/646993cf8763aea1dfa5801f1386ac3e8b58da5b_2.file.single_post.tpl.php on line 984
Notice: Trying to access array offset on value of type null in /var/www/clients/client0/web1/web/var/cache/prod/smarty/compile/ZOneTheme/64/69/93/646993cf8763aea1dfa5801f1386ac3e8b58da5b_2.file.single_post.tpl.php on line 984
 Close-up on dashcams
Notice: Undefined index: blog_config in /var/www/clients/client0/web1/web/var/cache/prod/smarty/compile/ZOneTheme/64/69/93/646993cf8763aea1dfa5801f1386ac3e8b58da5b_2.file.single_post.tpl.php on line 1103
Notice: Trying to get property 'value' of non-object in /var/www/clients/client0/web1/web/var/cache/prod/smarty/compile/ZOneTheme/64/69/93/646993cf8763aea1dfa5801f1386ac3e8b58da5b_2.file.single_post.tpl.php on line 1103
Notice: Trying to access array offset on value of type null in /var/www/clients/client0/web1/web/var/cache/prod/smarty/compile/ZOneTheme/64/69/93/646993cf8763aea1dfa5801f1386ac3e8b58da5b_2.file.single_post.tpl.php on line 1103
Read More
 How to choose your dashcam?
Notice: Undefined index: blog_config in /var/www/clients/client0/web1/web/var/cache/prod/smarty/compile/ZOneTheme/64/69/93/646993cf8763aea1dfa5801f1386ac3e8b58da5b_2.file.single_post.tpl.php on line 1103
Notice: Trying to get property 'value' of non-object in /var/www/clients/client0/web1/web/var/cache/prod/smarty/compile/ZOneTheme/64/69/93/646993cf8763aea1dfa5801f1386ac3e8b58da5b_2.file.single_post.tpl.php on line 1103
Notice: Trying to access array offset on value of type null in /var/www/clients/client0/web1/web/var/cache/prod/smarty/compile/ZOneTheme/64/69/93/646993cf8763aea1dfa5801f1386ac3e8b58da5b_2.file.single_post.tpl.php on line 1103
Read More
 Why install a Dashcam?
Notice: Undefined index: blog_config in /var/www/clients/client0/web1/web/var/cache/prod/smarty/compile/ZOneTheme/64/69/93/646993cf8763aea1dfa5801f1386ac3e8b58da5b_2.file.single_post.tpl.php on line 1103
Notice: Trying to get property 'value' of non-object in /var/www/clients/client0/web1/web/var/cache/prod/smarty/compile/ZOneTheme/64/69/93/646993cf8763aea1dfa5801f1386ac3e8b58da5b_2.file.single_post.tpl.php on line 1103
Notice: Trying to access array offset on value of type null in /var/www/clients/client0/web1/web/var/cache/prod/smarty/compile/ZOneTheme/64/69/93/646993cf8763aea1dfa5801f1386ac3e8b58da5b_2.file.single_post.tpl.php on line 1103
Read More
 Dashcam, useful in case of a disaster?
Notice: Undefined index: blog_config in /var/www/clients/client0/web1/web/var/cache/prod/smarty/compile/ZOneTheme/64/69/93/646993cf8763aea1dfa5801f1386ac3e8b58da5b_2.file.single_post.tpl.php on line 1103
Notice: Trying to get property 'value' of non-object in /var/www/clients/client0/web1/web/var/cache/prod/smarty/compile/ZOneTheme/64/69/93/646993cf8763aea1dfa5801f1386ac3e8b58da5b_2.file.single_post.tpl.php on line 1103
Notice: Trying to access array offset on value of type null in /var/www/clients/client0/web1/web/var/cache/prod/smarty/compile/ZOneTheme/64/69/93/646993cf8763aea1dfa5801f1386ac3e8b58da5b_2.file.single_post.tpl.php on line 1103
Read More
 Comparison of our 3 best DashCam
Notice: Undefined index: blog_config in /var/www/clients/client0/web1/web/var/cache/prod/smarty/compile/ZOneTheme/64/69/93/646993cf8763aea1dfa5801f1386ac3e8b58da5b_2.file.single_post.tpl.php on line 1103
Notice: Trying to get property 'value' of non-object in /var/www/clients/client0/web1/web/var/cache/prod/smarty/compile/ZOneTheme/64/69/93/646993cf8763aea1dfa5801f1386ac3e8b58da5b_2.file.single_post.tpl.php on line 1103
Notice: Trying to access array offset on value of type null in /var/www/clients/client0/web1/web/var/cache/prod/smarty/compile/ZOneTheme/64/69/93/646993cf8763aea1dfa5801f1386ac3e8b58da5b_2.file.single_post.tpl.php on line 1103
Read More